
How to Use Three.js And React to Render a 3D Model of Your Self

Get a 3D model of yourself
To get a customized 3D model, We well use Ready Player Me, a free-to-use 3D avatar creator from Wolf3D that allows anyone to create their own digital representation in a matter of minutes, no 3D modeling experience required. All you need to do is take a quick selfie and wait as the program automatically generates a custom 3D avatar based on your likeness.
You’re then free to make your own adjustments to the character using an okay range of hairstyles, skin tones, facial features, clothing options, and other customizable attributes.
After signing in to Ready Player Me, You need to follow the steps below and you good to go.
Choose a body type

Upload a photo of yourself

Customize your look

Download your model
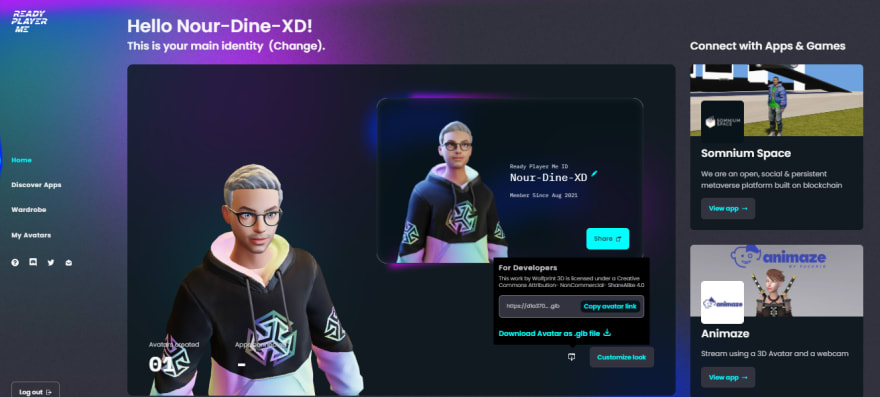
Render the model in React
To render the model in our React app, We will use react-three-fiber a React renderer for Threejs.
Setting up the project
First, let’s create a new React project with Create React App:
npx create-react-app my-3d-model
#or
yarn create react-app my-3d-model
Afterwards, install @react-three/fiber and @react-three/drei with the command below:
npm install three @react-three/fiber @react-three/drei
#or
yarn add three @react-three/fiber @react-three/drei
Converting the model into a reusable React component
Once you’re done, go ahead and run the command below to create a javascript file using gltfjsx that plots out all of the assets contents in the format of a React functional component.
npx gltfjsx model.glb
The file’s content will look similar to the following code:
import React, { useRef } from 'react';
import { useGLTF } from '@react-three/drei';

export default function Model({ ...props }) {
   const group = useRef();
   const { nodes, materials } = useGLTF('/model.glb');
   return (
      <group ref={group} {...props} dispose={null}>
         <primitive object={nodes.Hips} />
         <skinnedMesh
            geometry={nodes.Wolf3D_Body.geometry}
            material={materials.Wolf3D_Body}
            skeleton={nodes.Wolf3D_Body.skeleton}
         />
         <skinnedMesh
            geometry={nodes.Wolf3D_Glasses.geometry}
            material={materials.Wolf3D_Glasses}
            skeleton={nodes.Wolf3D_Glasses.skeleton}
         />
         <skinnedMesh
            geometry={nodes.Wolf3D_Hair.geometry}
            material={materials.Wolf3D_Hair}
            skeleton={nodes.Wolf3D_Hair.skeleton}
         />
         <skinnedMesh
            geometry={nodes.Wolf3D_Outfit_Bottom.geometry}
            material={materials.Wolf3D_Outfit_Bottom}
            skeleton={nodes.Wolf3D_Outfit_Bottom.skeleton}
         />
         <skinnedMesh
            geometry={nodes.Wolf3D_Outfit_Footwear.geometry}
            material={materials.Wolf3D_Outfit_Footwear}
            skeleton={nodes.Wolf3D_Outfit_Footwear.skeleton}
         />
         <skinnedMesh
            geometry={nodes.Wolf3D_Outfit_Top.geometry}
            material={materials.Wolf3D_Outfit_Top}
            skeleton={nodes.Wolf3D_Outfit_Top.skeleton}
         />
         <skinnedMesh
            name="EyeLeft"
            geometry={nodes.EyeLeft.geometry}
            material={nodes.EyeLeft.material}
            skeleton={nodes.EyeLeft.skeleton}
            morphTargetDictionary={nodes.EyeLeft.morphTargetDictionary}
            morphTargetInfluences={nodes.EyeLeft.morphTargetInfluences}
         />
         <skinnedMesh
            name="EyeRight"
            geometry={nodes.EyeRight.geometry}
            material={nodes.EyeRight.material}
            skeleton={nodes.EyeRight.skeleton}
            morphTargetDictionary={nodes.EyeRight.morphTargetDictionary}
            morphTargetInfluences={nodes.EyeRight.morphTargetInfluences}
         />
         <skinnedMesh
            name="Wolf3D_Head"
            geometry={nodes.Wolf3D_Head.geometry}
            material={materials.Wolf3D_Skin}
            skeleton={nodes.Wolf3D_Head.skeleton}
            morphTargetDictionary={nodes.Wolf3D_Head.morphTargetDictionary}
            morphTargetInfluences={nodes.Wolf3D_Head.morphTargetInfluences}
         />
         <skinnedMesh
            name="Wolf3D_Teeth"
            geometry={nodes.Wolf3D_Teeth.geometry}
            material={materials.Wolf3D_Teeth}
            skeleton={nodes.Wolf3D_Teeth.skeleton}
            morphTargetDictionary={nodes.Wolf3D_Teeth.morphTargetDictionary}
            morphTargetInfluences={nodes.Wolf3D_Teeth.morphTargetInfluences}
         />
      </group>
   );
}

useGLTF.preload('/model.glb');
creating the scene
import React, { Suspense } from 'react';
import { Canvas } from '@react-three/fiber';
import { OrbitControls } from '@react-three/drei';

export default function App() {
   return (
      <Canvas
         camera={{ position: [2, 0, 12.25], fov: 15 }}
         style={{
            backgroundColor: '#111a21',
            width: '100vw',
            height: '100vh',
         }}
      >
         <ambientLight intensity={1.25} />
         <ambientLight intensity={0.1} />
         <directionalLight intensity={0.4} />
         <Suspense fallback={null}>
            // your model here
         </Suspense>
         <OrbitControls />
      </Canvas>
   );
}
Adding the model to the scene
First add the model (glb file) to the public folder, For the generated javascript file by gltfjsx you can add it either to the src folder or to the components folder.
import React, { Suspense } from 'react';
import { Canvas } from '@react-three/fiber';
import { OrbitControls } from '@react-three/drei';
import Model from './Model'; /* highlight-line */

export default function App() {
   return (
      <Canvas
         camera={{ position: [2, 0, 12.25], fov: 15 }}
         style={{
            backgroundColor: '#111a21',
            width: '100vw',
            height: '100vh',
         }}
      >
         <ambientLight intensity={1.25} />
         <ambientLight intensity={0.1} />
         <directionalLight intensity={0.4} />
         <Suspense fallback={null}>
            <Model position={[0.025, -0.9, 0]} /> /* highlight-line */
         </Suspense>
         <OrbitControls />
      </Canvas>
   );
}
body {
   margin: 0;
   display: flex;
   align-items: center;
   justify-content: center;
   height: 100vh;
}
result:
https://codesandbox.io/s/bold-wing-9w9n3i?file=/src/Model.js
Add animations to the model
To be able to add animations to your 3D model, You need to have blender installed in your machine.
Import the model to blender
Blender is the free and open source 3D creation suite. It supports the entirety of the 3D pipeline modeling, rigging, animation, simulation, rendering, compositing and motion tracking, even video editing and game creation.
learn more
Create a new blender project

Clear the scene from all the objects
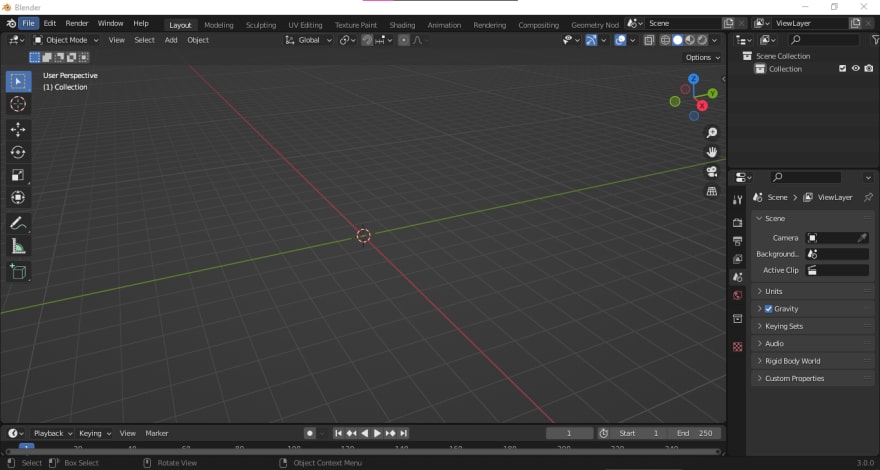
Import the glb file to blender
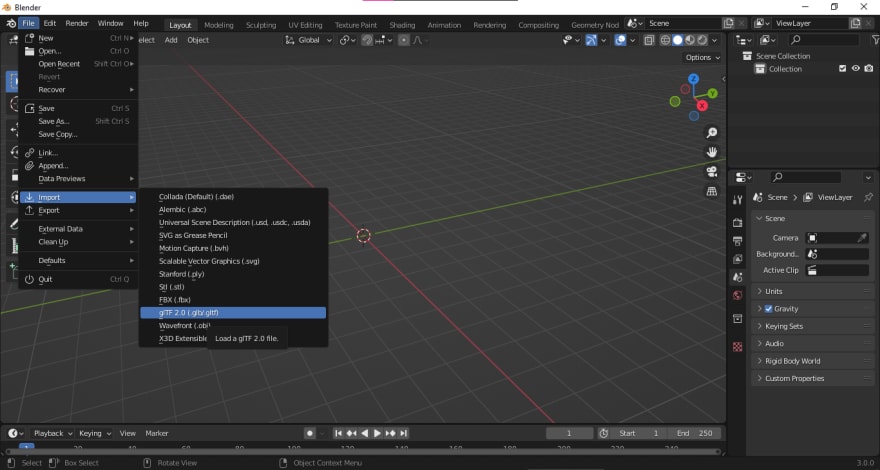

Select your model and click Import glTF 2.0

Convert the model to fbx format
Before adding any animations to our model we need first to convert it into a FBX format.
Select the model
To select your 3D model in blender you only need to click on the letter a or you can use the mouse to do so.

Export the model as FBX
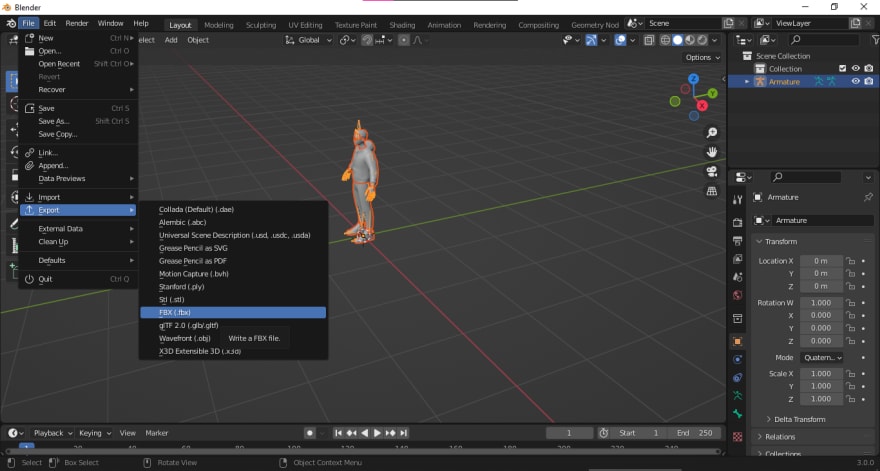

Make sure to set Path Mode to Copy, and check the Embed textures option.
Adding animations with mixamo
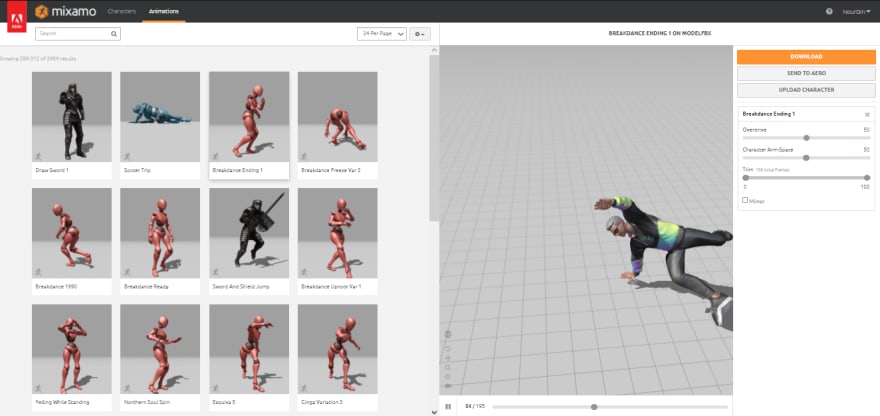
Mixamo is a free online service for automatically rigging and animating 3-D characters. It was developed by Mixamo Incorporated, which was purchased by Adobe in 2015. Mixamo allows users to upload FBX, OBJ, or Zip files, and then the website attempts to automatically rig the character in under two minutes. The rigging process works best with humanoid characters.
Upload the model to mixamo


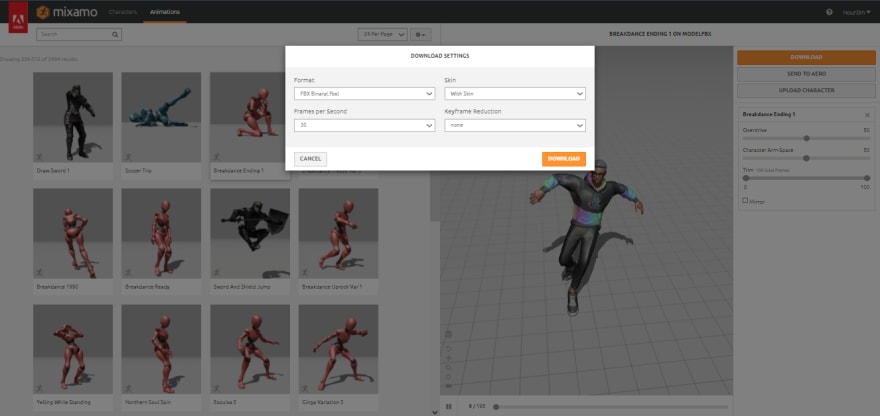
Select an animation and download the animated model
Convert the animated model back to glb format
To use the model in our React app we need to change it back to glb format.
Import the animated model to blender

Export the animated model as glb

Rendering the animated model in React
In the public folder replace the model.glb file with the animated model, and add the changes below to src/Model.js file.
import React, { useRef, useEffect } from 'react'; /* highlight-line */
import { useGLTF, useAnimations } from '@react-three/drei'; /* highlight-line */

export default function Model({ ...props }) {
   const group = useRef();
   const { nodes, materials, animations } = useGLTF('/model.glb');

   const { actions } = useAnimations(animations, group); /* highlight-line */

   // 'Armature|mixamo.com|Layer0' is the name of the animation we need to run.
   // console.log(actions);

   useEffect(() => {/* highlight-line */
      actions['Armature|mixamo.com|Layer0'].play(); /* highlight-line */
   }); /* highlight-line */

   return (
      <group ref={group} {...props} dispose={null}>
         <primitive object={nodes.Hips} />
         <skinnedMesh
            geometry={nodes.Wolf3D_Body.geometry}
            material={materials.Wolf3D_Body}
            skeleton={nodes.Wolf3D_Body.skeleton}
         />
         <skinnedMesh
            geometry={nodes.Wolf3D_Glasses.geometry}
            material={materials.Wolf3D_Glasses}
            skeleton={nodes.Wolf3D_Glasses.skeleton}
         />
         <skinnedMesh
            geometry={nodes.Wolf3D_Hair.geometry}
            material={materials.Wolf3D_Hair}
            skeleton={nodes.Wolf3D_Hair.skeleton}
         />
         <skinnedMesh
            geometry={nodes.Wolf3D_Outfit_Bottom.geometry}
            material={materials.Wolf3D_Outfit_Bottom}
            skeleton={nodes.Wolf3D_Outfit_Bottom.skeleton}
         />
         <skinnedMesh
            geometry={nodes.Wolf3D_Outfit_Footwear.geometry}
            material={materials.Wolf3D_Outfit_Footwear}
            skeleton={nodes.Wolf3D_Outfit_Footwear.skeleton}
         />
         <skinnedMesh
            geometry={nodes.Wolf3D_Outfit_Top.geometry}
            material={materials.Wolf3D_Outfit_Top}
            skeleton={nodes.Wolf3D_Outfit_Top.skeleton}
         />
         <skinnedMesh
            name="EyeLeft"
            geometry={nodes.EyeLeft.geometry}
            material={nodes.EyeLeft.material}
            skeleton={nodes.EyeLeft.skeleton}
            morphTargetDictionary={nodes.EyeLeft.morphTargetDictionary}
            morphTargetInfluences={nodes.EyeLeft.morphTargetInfluences}
         />
         <skinnedMesh
            name="EyeRight"
            geometry={nodes.EyeRight.geometry}
            material={nodes.EyeRight.material}
            skeleton={nodes.EyeRight.skeleton}
            morphTargetDictionary={nodes.EyeRight.morphTargetDictionary}
            morphTargetInfluences={nodes.EyeRight.morphTargetInfluences}
         />
         <skinnedMesh
            name="Wolf3D_Head"
            geometry={nodes.Wolf3D_Head.geometry}
            material={materials.Wolf3D_Skin}
            skeleton={nodes.Wolf3D_Head.skeleton}
            morphTargetDictionary={nodes.Wolf3D_Head.morphTargetDictionary}
            morphTargetInfluences={nodes.Wolf3D_Head.morphTargetInfluences}
         />
         <skinnedMesh
            name="Wolf3D_Teeth"
            geometry={nodes.Wolf3D_Teeth.geometry}
            material={materials.Wolf3D_Teeth}
            skeleton={nodes.Wolf3D_Teeth.skeleton}
            morphTargetDictionary={nodes.Wolf3D_Teeth.morphTargetDictionary}
            morphTargetInfluences={nodes.Wolf3D_Teeth.morphTargetInfluences}
         />
      </group>
   );
}

useGLTF.preload('/model.glb');
result:
https://codesandbox.io/s/3d-model-animation-d41e9u?file=/src/Model.js:271-281
Copy from : https://dev.to/nourdinedev/how-to-use-threejs-and-react-to-render-a-3d-model-of-your-self-4kkf